Your power adapter typically stops working due to wall outlet issues, damaged cables, blown thermal fuses, mismatched voltages, deteriorated internal capacitors, overheating, or physical solder joint cracking. If your power adapter stopped working during a critical shift, this comprehensive technical troubleshooting guide will walk you through the precise diagnostics and recovery steps needed to resolve the issue. Knowing how to diagnose and address the core failures of your power supply allows you to restore operation quickly and prevent costly downtime.
Why Has Your Power Adapter Stopped Working? (Flowchart)
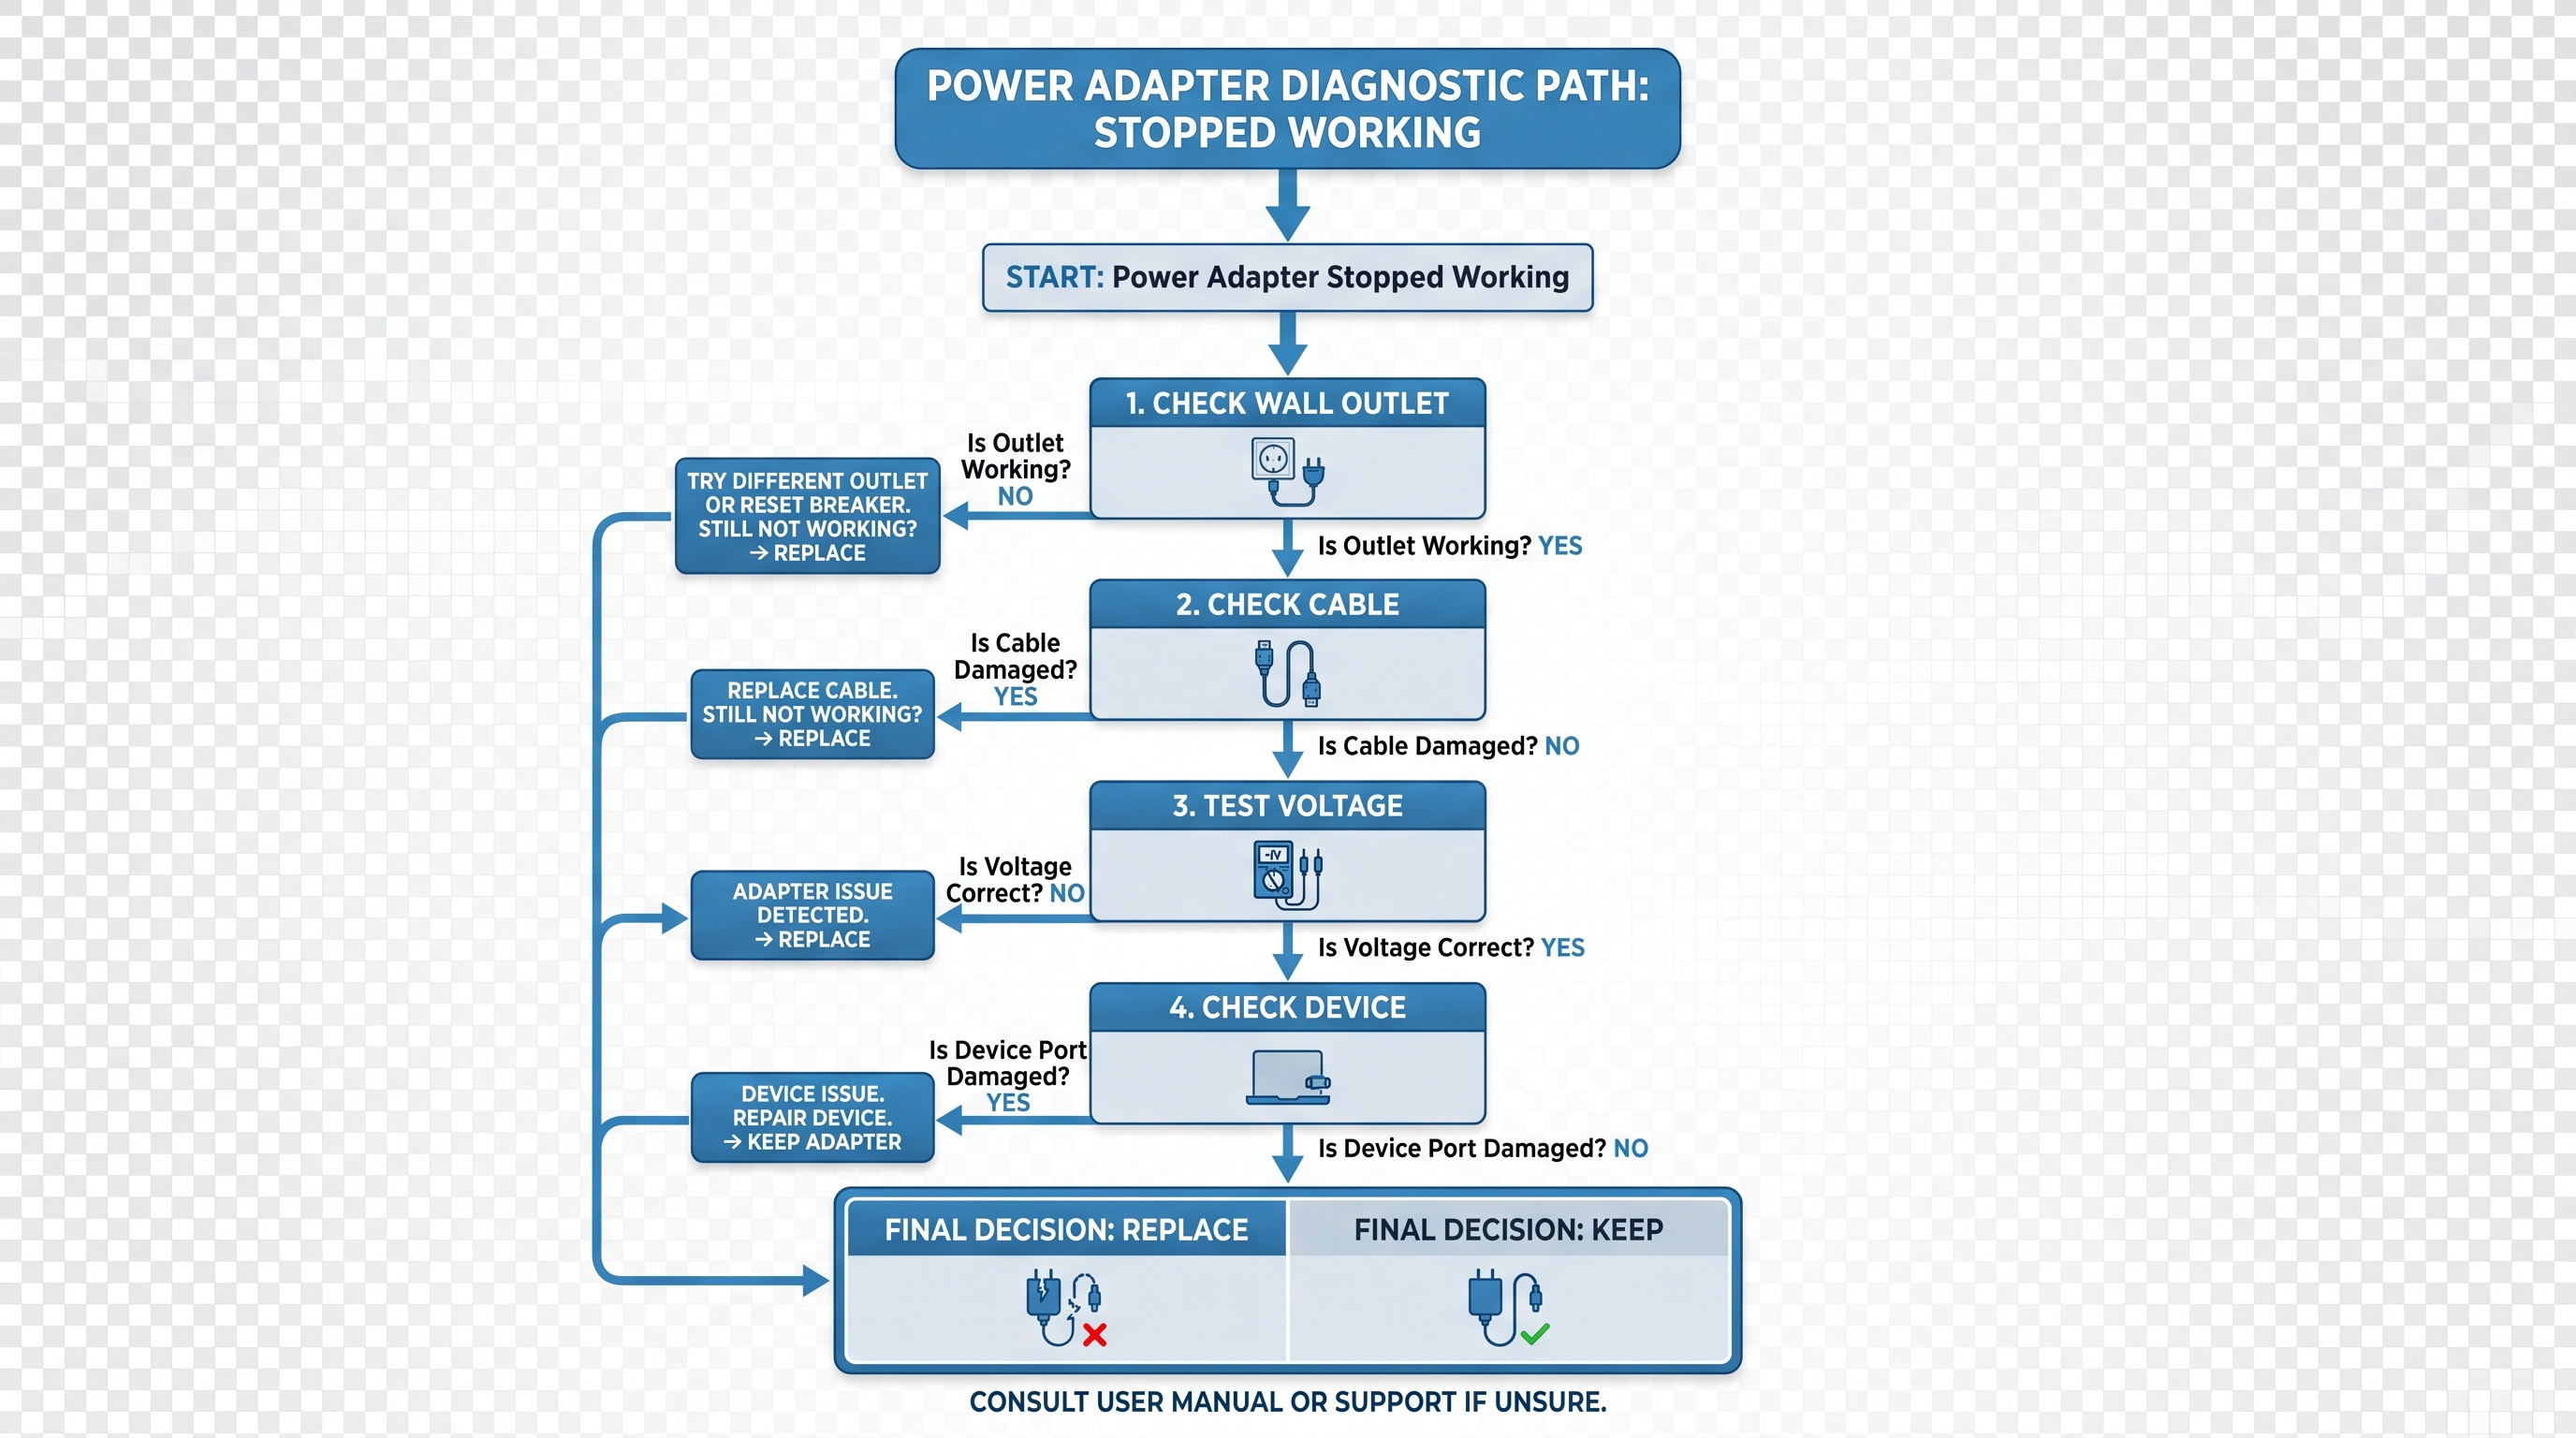
Yes, a systematic diagnostic flowchart is the fastest way to determine why your unit failed. When your power adapter stopped working, tracing the electrical path from the AC source to the DC load identifies the exact failure point. This visual map helps you quickly isolate whether the root cause is external mains power loss or internal component degradation.
How do you use this diagnostic flowchart?
Look:
You must follow a step-by-step logic gate to avoid wasting hours on trial-and-error replacements. If your power adapter not working symptoms persist, verifying the AC mains indicator LED is your first priority. This simple visual indicator immediately splits your troubleshooting path between high-voltage input errors and low-voltage output cable faults.
- Step 1: Check if the wall outlet has active power by plugging in a known good device.
- Step 2: Wiggle the DC cable to identify intermittent connections at the strain relief.
- Step 3: Use a multimeter to measure the DC output voltage of the adapter.
| Test Stage | Normal State | Failure State | Action | |
|---|---|---|---|---|
| AC Inlet | Active Mains Voltage | 0V at Outlet | Check Circuit Breaker | |
| DC Output | Rated Output Voltage | Power Adapter No Output | Replace Faulty Power Adapter |
This data shows that isolating input power from output failure is essential for fast diagnosis.
Key Takeaway: Systematically tracing the power path with a diagnostic flowchart prevents you from replacing functional adapters when the actual fault lies in the wall outlet or the connected load.
Loose Wall Plug: Why Has Your Power Adapter Stopped Working?
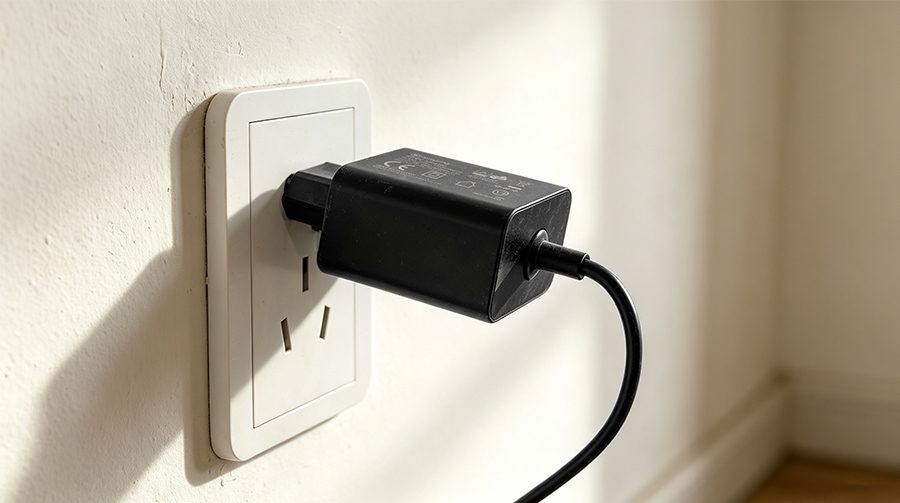
Yes, a loose physical connection at the AC wall receptacle will instantly prevent electricity from reaching the transformer. If your physical power adapter stopped working after being bumped, the prongs may have lost contact with the worn internal leaf springs of the outlet. This mechanical disconnect stops current flow, causing your downstream device to lose power immediately.
How do you identify loose AC connections?
But that’s not all.
You must realize that physical outlet wear often goes unnoticed until the connected hardware abruptly shuts down. When a power adapter suddenly died, look closely at how tightly the blades fit into the wall receptacle. A loose plug can cause high-voltage electrical arcing, which damages the metal contacts and presents a serious fire hazard.
- Inspect the metal blades for dark carbon residue or physical pitting.
- Check if the adapter drops or sags downward under its own weight when plugged in.
- Test the wall outlet’s retention force by inserting a standard three-prong tester.
| Connection Fit | Electrical Risk | Contact Resistance | Corrective Action | |
|---|---|---|---|---|
| Tight/Secure | None | < 0.1 Ohm | Normal operation | |
| Loose/Wobbly | Arcing & Overheating | High / Variable | Replace wall outlet receptacle |
This comparison highlights how structural loose fits lead directly to increased resistance and localized thermal hazards.
Key Takeaway: Do not ignore a wobbly wall connection; replacing a worn wall outlet is cheaper than replacing a damaged power adapter.
Frayed DC Cables: Why Has Your Power Adapter Stopped Working?
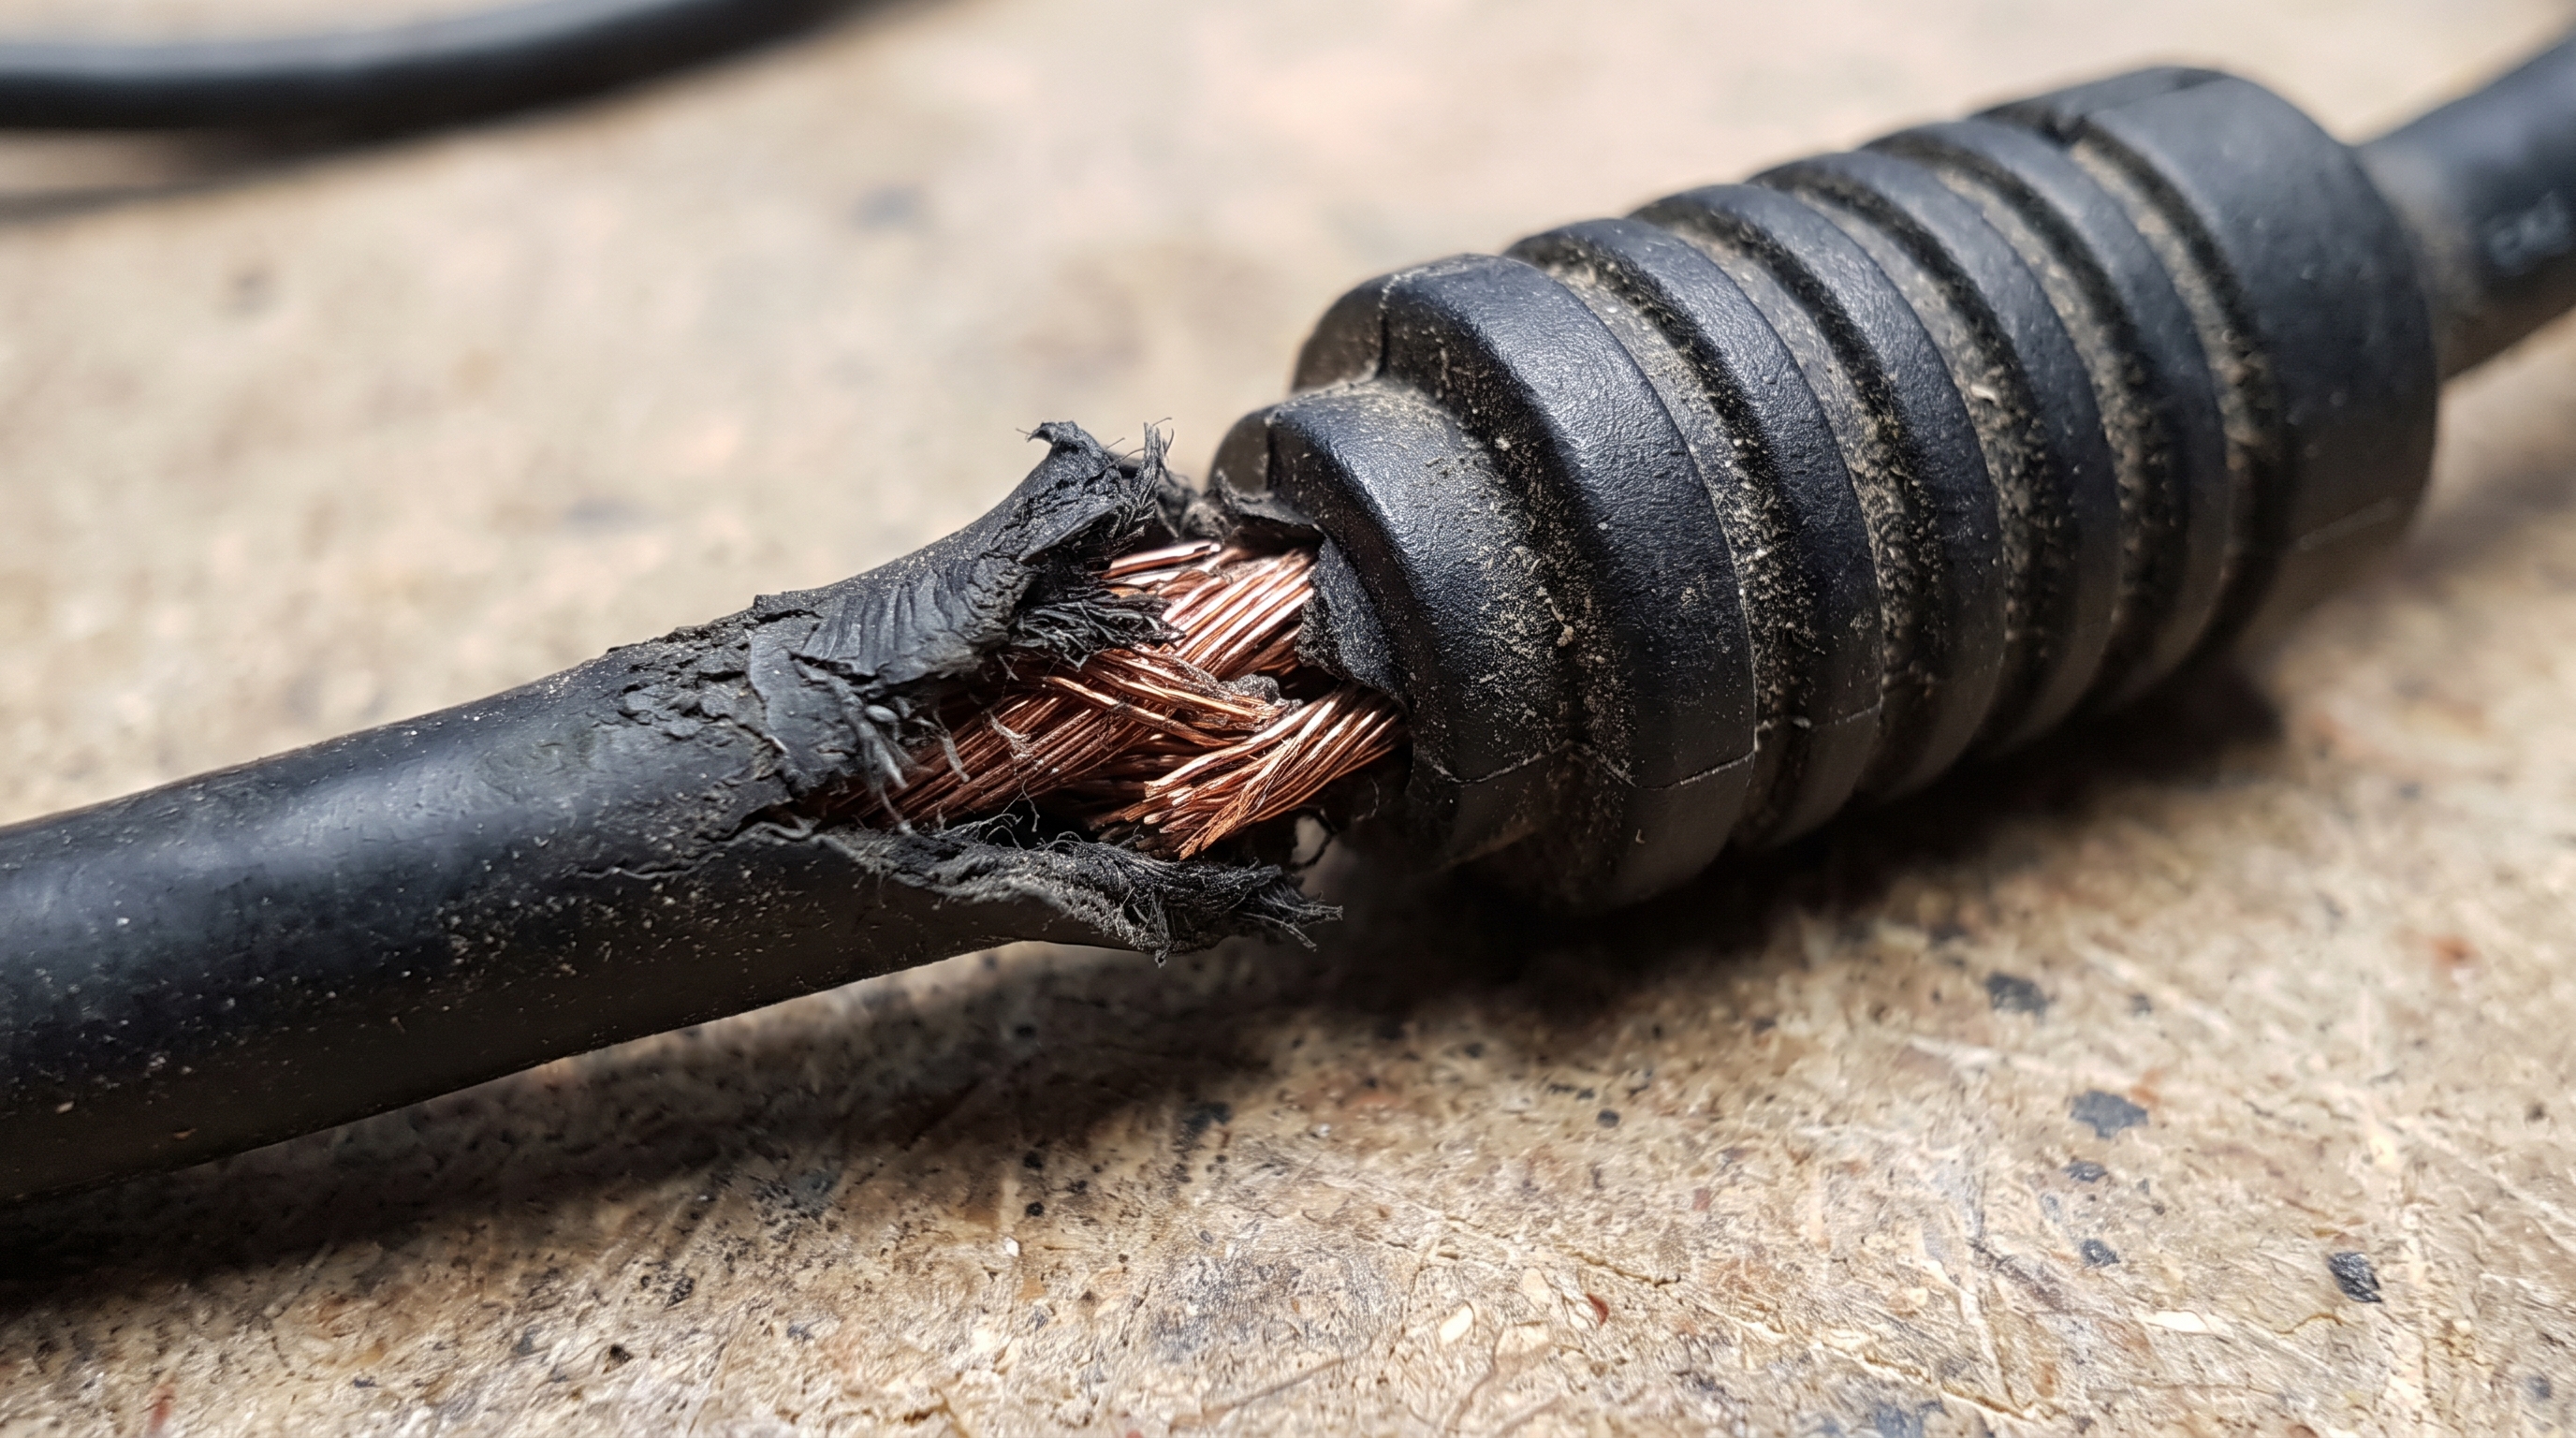
Yes, frayed copper wires inside the DC cable will cause a complete electrical open or short circuit. When your power adapter stopped working due to physical cable wear, constant bending near the strain relief has likely fractured the delicate copper strands inside. This structural failure restricts current flow and can trigger the adapter’s built-in short-circuit protection.
How do you diagnose frayed internal cables?
Here is the kicker:
You cannot see the copper break through the thick PVC insulation without careful diagnostic physical testing. When a power adapter overheating symptom occurs near the cable joint, it is a clear warning that the remaining copper strands are overloaded. Flexing the cable while monitoring your device’s power LED will help you isolate the exact point of the copper break.
- Gently bend the cable near the rubber strain relief boot to check for flickering.
- Feel the length of the cord for localized hot spots during active operation.
- Use a digital multimeter to run a continuity test across the positive and negative lines.
| Cable State | Resistance Value | Device Behavior | Safety Level | |
|---|---|---|---|---|
| Intact | < 0.5 Ohms | Continuous Power | Safe | |
| Frayed/Broken | Infinite (OL) / Fluctuation | Intermittent Shutdown | Dangerous (Arcing Risk) |
These values prove that even a partially frayed cable presents high resistance and potential fire hazards.
Key Takeaway: Never patch frayed DC cords with electrical tape; you must replace a faulty power adapter cable assembly to maintain operational safety.
Loose Barrel Jack: Why Has Your Power Adapter Stopped Working?
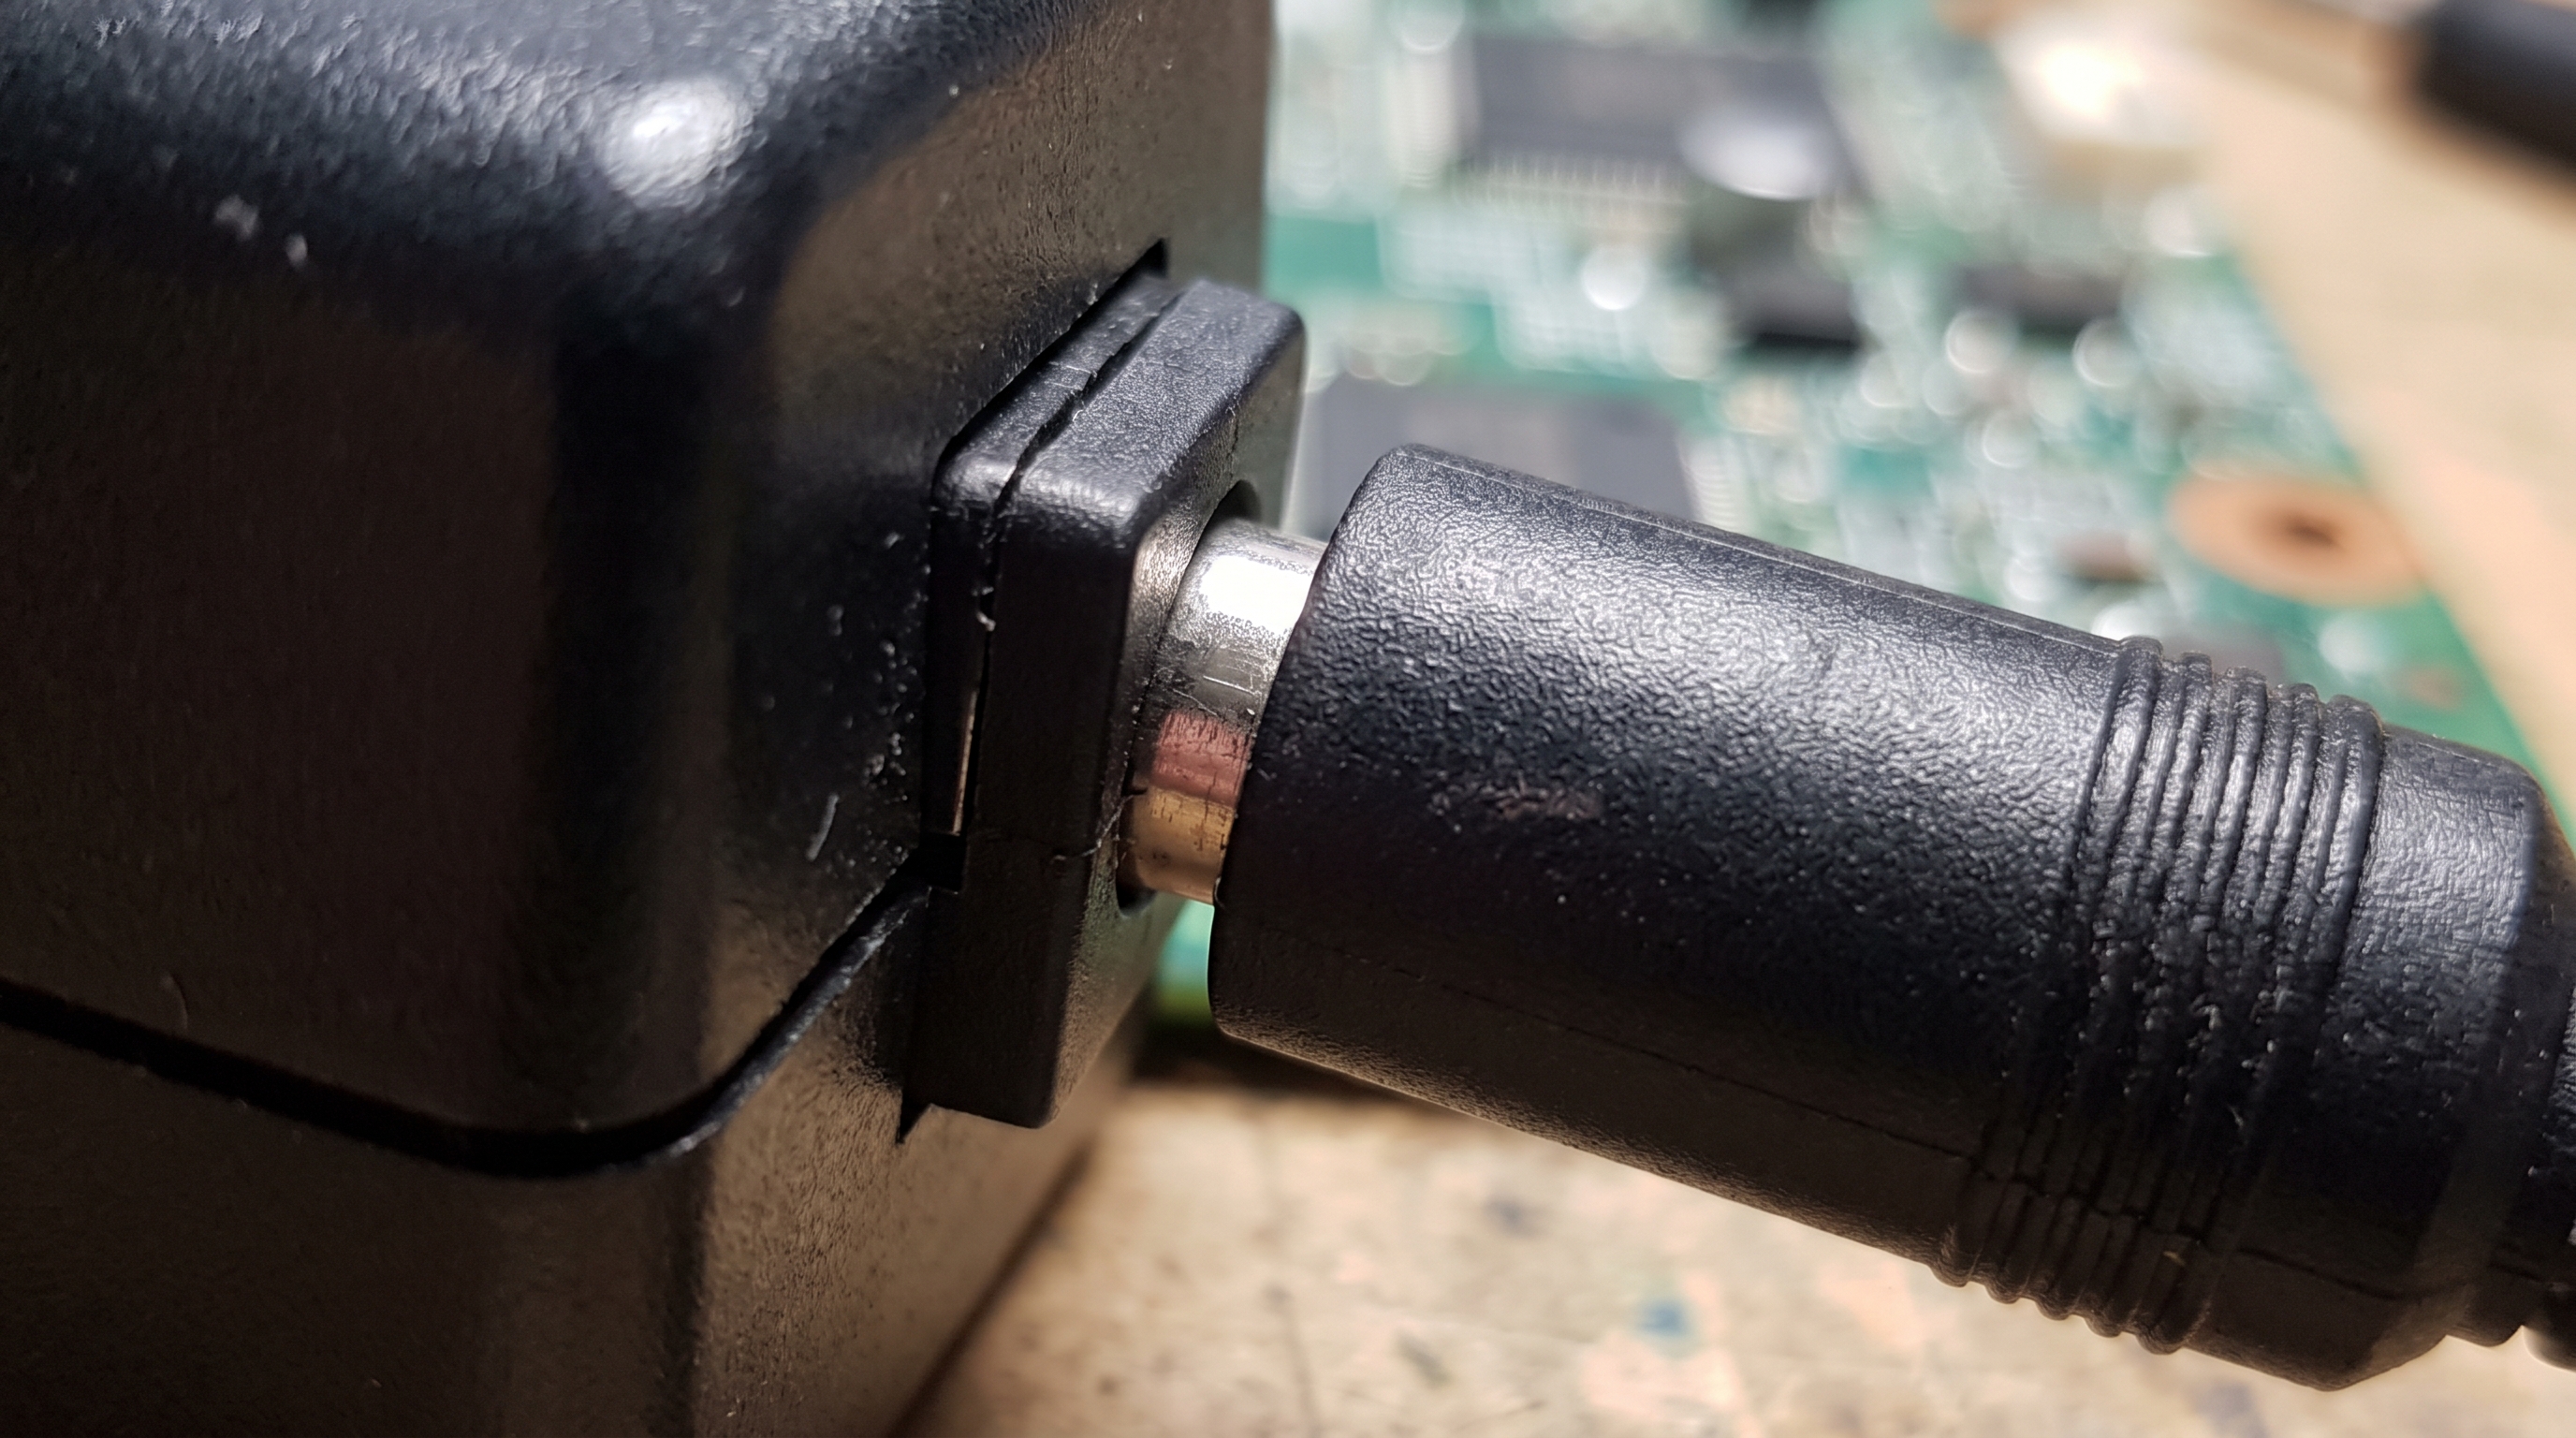
Yes, a loose barrel jack connector prevents reliable electrical contact, causing intermittent power cuts. If your power adapter stopped working when you shifted your laptop or industrial terminal, the spring-loaded contacts inside the female DC jack have likely lost their retention tension. This mechanical loose fit creates a high-resistance bridge that stops the adapter from delivering stable voltage.
How do you repair a loose barrel jack connection?
But wait, there’s more.
You must avoid jammed paperclips or foil to tighten the connection, as these temporary workarounds can easily short out your system’s motherboard. If you learn how to test a power adapter connection properly, you will find that a mismatched outer or inner pin diameter is the primary cause of loose barrel jacks. Selecting a high-quality connector with an internal locking mechanism resolves this issue permanently.
- Measure the outer diameter (OD) and inner pin diameter (ID) of your DC barrel plug.
- Clean the internal contacts of the female port with specialized electronic contact cleaner.
- Solder a new, matching DC connector plug onto the cable if the current barrel is deformed.
| Connector Size | Common Outer Diameter | Common Inner Pin | Common Applications | |
|---|---|---|---|---|
| Standard 5.5mm | 5.5 mm | 2.1 mm or 2.5 mm | Industrial monitors, routers, LED strips | |
| Micro-sized | 3.5 mm | 1.35 mm | Smart home sensors, compact medical devices |
This dimensional matrix demonstrates why even a tiny 0.4mm difference in inner pins causes complete power loss.
Key Takeaway: Always verify matching barrel jack dimensions (such as 5.5mm x 2.1mm vs. 5.5mm x 2.5mm) to ensure a secure, spark-free physical fit.
Thermal Overheating: Why Has Your Power Adapter Stopped Working?
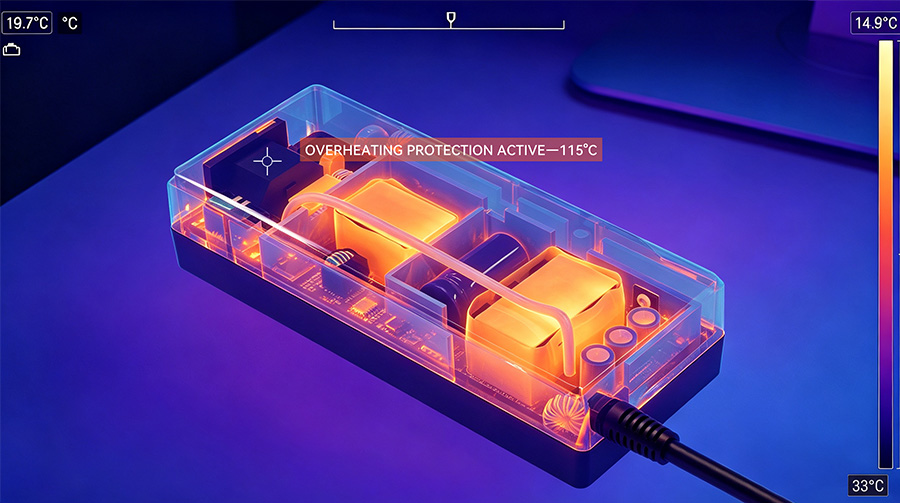
Yes, severe overheating will trigger the internal thermal shutdown circuit, rendering the unit temporarily non-operational. When your power adapter stopped working on a hot day or in an unventilated enclosure, the primary switching IC disabled output to prevent melting or combustion. Once the adapter cools down to a safe temperature, the self-resetting thermal cutoff will usually restore power.
Why does your power adapter overheat?
Here is the truth.
You must realize that operating a power supply at its absolute limit in a sealed cabinet is a primary power adapter failure causes scenario. Cheap adapters lack adequate internal aluminum heat spreaders, forcing the internal transformer and silicon components to cook in their own waste heat.
- Avoid stacking adapters on top of each other or burying them under server cables.
- Ensure ambient operating temperatures remain within the manufacturer’s rated limits (under 40°C).
- Clean dust and lint buildup off the adapter’s plastic or aluminum enclosure regularly.
| Adapter Enclosure | Heat Dissipation Method | Operating Efficiency | Max Safe Temp | |
|---|---|---|---|---|
| Standard Plastic | Passive Air Convection | Low | 65°C on surface | |
| Aluminum Heatsink | Direct Metallic Conduction | High | 85°C on components |
These specifications show how metal housings and active thermal pads dramatically improve safety margins under high-load situations.
Key Takeaway: Mitigate thermal shutdowns by providing ample physical ventilation and specifying power adapters with high-efficiency ratings like DoE Level VI.
Lab QC Testing: Why Has Your Power Adapter Stopped Working?
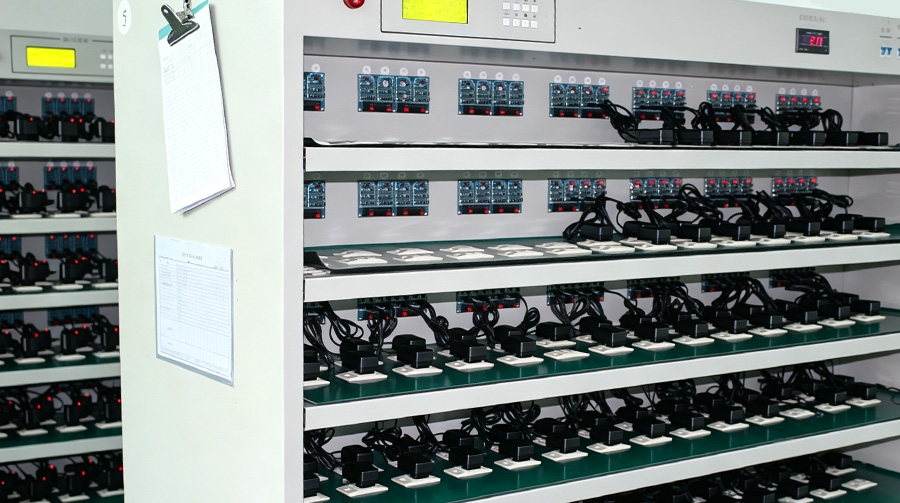
Yes, extensive laboratory quality testing isolates hidden manufacturing defects that explain why your unit failed. If your generic power adapter stopped working during standard duty cycles, it likely missed out on crucial factory burn-in and environmental stress testing. Professional-grade power supplies undergo rigorous electrical load cycles to ensure they do not fail prematurely in critical B2B deployments.
How does laboratory testing prevent adapter failure?
Look:
You cannot afford to rely on unverified adapters when your operation depends on continuous power. A reliable power adapter manufacturer uses specialized laboratory test racks to subject production batches to 100% full-load aging tests before shipment. This rigorous quality control filters out weak components, ensuring that your equipment remains online without unexpected power failures.
- Full-load burn-in testing run continuously for several hours at elevated temperatures.
- Automated optical inspection (AOI) to find microscopic soldering flaws on the PCB.
- High-voltage isolation (Hi-Pot) testing to verify electrical insulation integrity.
| Quality Test | Objective | Target Parameter | Failure Action | |
|---|---|---|---|---|
| Burn-In Aging | Weed out infant mortality | 100% Load @ 40°C | Scrap failed unit | |
| Hi-Pot Isolation | Prevent high-voltage shock | 3,000V AC Input-to-Output | Redesign insulation barrier |
This structured testing protocol ensures that every shipped adapter meets the highest global standards for safety and reliability.
Key Takeaway: Always partner with a manufacturer that provides verifiable, 100% burn-in test reports to guarantee long-term system durability.
Failed PCB Capacitors: Why Has Your Power Adapter Stopped Working?
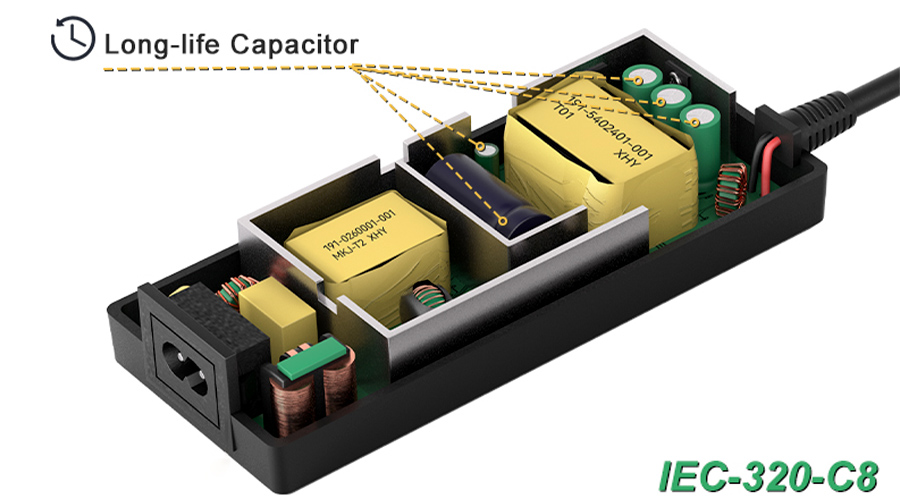
Yes, dried-out or bulged electrolytic filtering capacitors are a leading internal reason why your adapter will fail. When your power adapter stopped working after years of continuous service, the wet liquid electrolyte inside these aluminum canisters slowly evaporated due to constant internal heat. This causes a steep loss in capacitance and increases electrical ripple, triggering the connected device’s safety shutdown.
How do you detect failed PCB capacitors?
But that’s not all.
You can easily spot failed electrolytic capacitors by inspecting the physical circuit board for telling visual deformities. When a power adapter no output failure occurs, look for aluminum cans with bulging, domed tops or crusty brown residue leaked around their solder bases. Replacing these worn-out elements restores smooth filtering and returns the adapter to peak performance.
- Inspect the top aluminum vents for any doming, bulging, or physical ruptures.
- Look for yellowish-brown crusty deposits on the PCB surface near capacitor legs.
- Use an ESR (Equivalent Series Resistance) meter to test the health of questionable capacitors.
| Capacitor Class | Expected Lifespan | Temperature Rating | Failure Mechanism | |
|---|---|---|---|---|
| Low-Cost Wet | 2,000 Hours | 85°C | Electrolyte Dry-Out | |
| Solid Polymer | 20,000+ Hours | 105°C | Safe high-frequency wear |
This comparison shows why solid polymer or premium Japanese-brand wet capacitors last up to ten times longer in industrial hardware.
Key Takeaway: Prevent early component aging by specifying 105°C-rated Japanese capacitors during your power adapter sourcing phase.
Desk Setup Safety: Why Has Your Power Adapter Stopped Working?
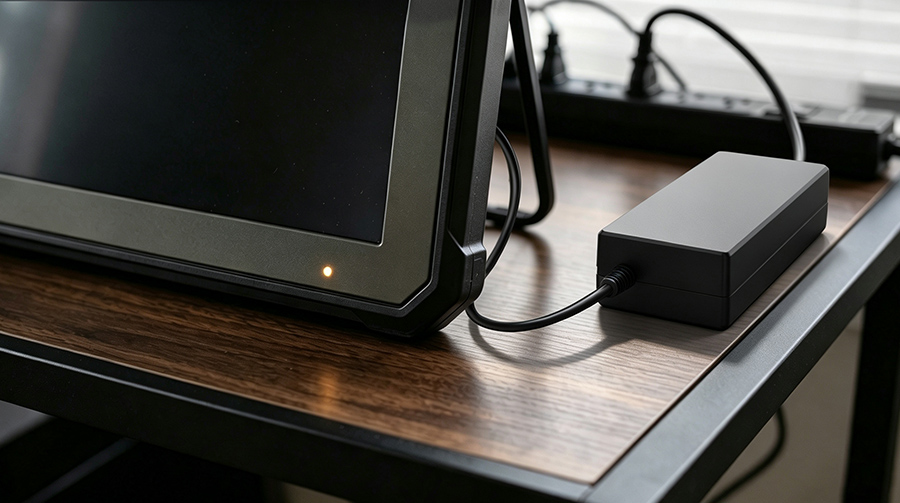
Yes, an untidy or poorly arranged work desk can lead to physical stress on power lines, resulting in complete system failure. If your power adapter stopped working in a busy office, the unit may have been kicked, dropped, or smothered by books, blocking its essential cooling vents. Managing your desk layout ensures your power components are physically protected and have sufficient room to dissipate operational heat.
How do you protect power adapters on your desk?
Here is the kicker:
You must realize that clean cable routing is not just about visual aesthetics; it is vital for electrical safety. When your desk setup experiences sudden power cuts, organizing the desktop power adapter off the floor and away from heavy foot traffic prevents physical cord damage and accidental unplugs.
- Use under-desk cable management trays to elevate your adapters off the floor.
- Group cables neatly with velcro straps, ensuring you do not bend them at sharp angles.
- Position the power brick away from direct heat sources like PC exhausts or radiators.
| Desk Layout Factor | Risk to Adapter | Preventive Solution | |
|---|---|---|---|
| Floor Placement | Foot traffic, dust build-up | Mount adapter in an elevated wire tray | |
| Cable Bundling | High thermal build-up | Use breathable velcro ties and maintain airflow |
This practical desk layout advice dramatically lowers the risk of accidental cable drops and thermal fatigue.
Key Takeaway: Elevating and organizing your desktop adapters keeps them cool, clean, and safe from physical impacts that cause internal failures.
Voltage Measurement: Why Has Your Power Adapter Stopped Working?
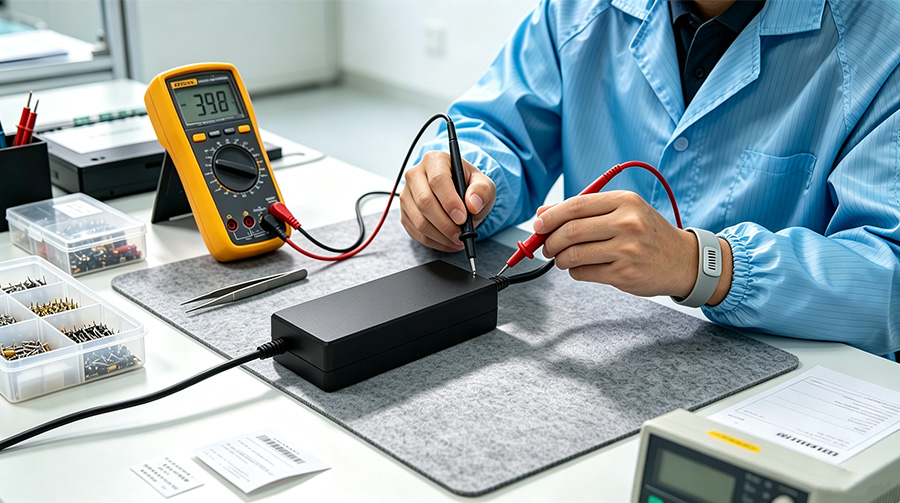
Yes, verifying the exact output voltage with a digital multimeter is the definitive way to check if your unit is dead. If your power adapter stopped working, a simple visual inspection is rarely enough to diagnose invisible board-level issues. Measuring the actual DC voltage at the connector pin ensures you have accurate diagnostic data before making a replacement decision.
How do you measure voltage with a multimeter?
But wait, there’s more.
You must set your digital multimeter to the DC Voltage mode to avoid blowing your meter’s internal fuse. Once you learn how to test a power adapter output correctly, you can compare the measured voltage with the exact specification printed on the adapter’s physical label. If the meter displays 0V or a fluctuating low voltage, the internal primary circuit has failed.
- Set your multimeter dial to the “DC Voltage” setting (usually marked as V with a straight line).
- Insert the black probe into the outer barrel and the red probe into the inner pin.
- Read the screen to verify if the output matches the required voltage exactly.
| Target Voltage | Multimeter Reading | Adapter Health | Required Action | |
|---|---|---|---|---|
| 12.0 V | 12.0 V to 12.2 V | Healthy | No action needed | |
| 12.0 V | 0.0 V or < 10V | Failed | Replace a faulty power adapter |
This measurement process removes the guesswork from troubleshooting, pointing you directly to either a bad adapter or a faulty device.
Key Takeaway: A multimeter measurement is the only foolproof way to confirm whether a power supply is dead or if your connected device has failed.
Cracked Solder Joint: Why Has Your Power Adapter Stopped Working?
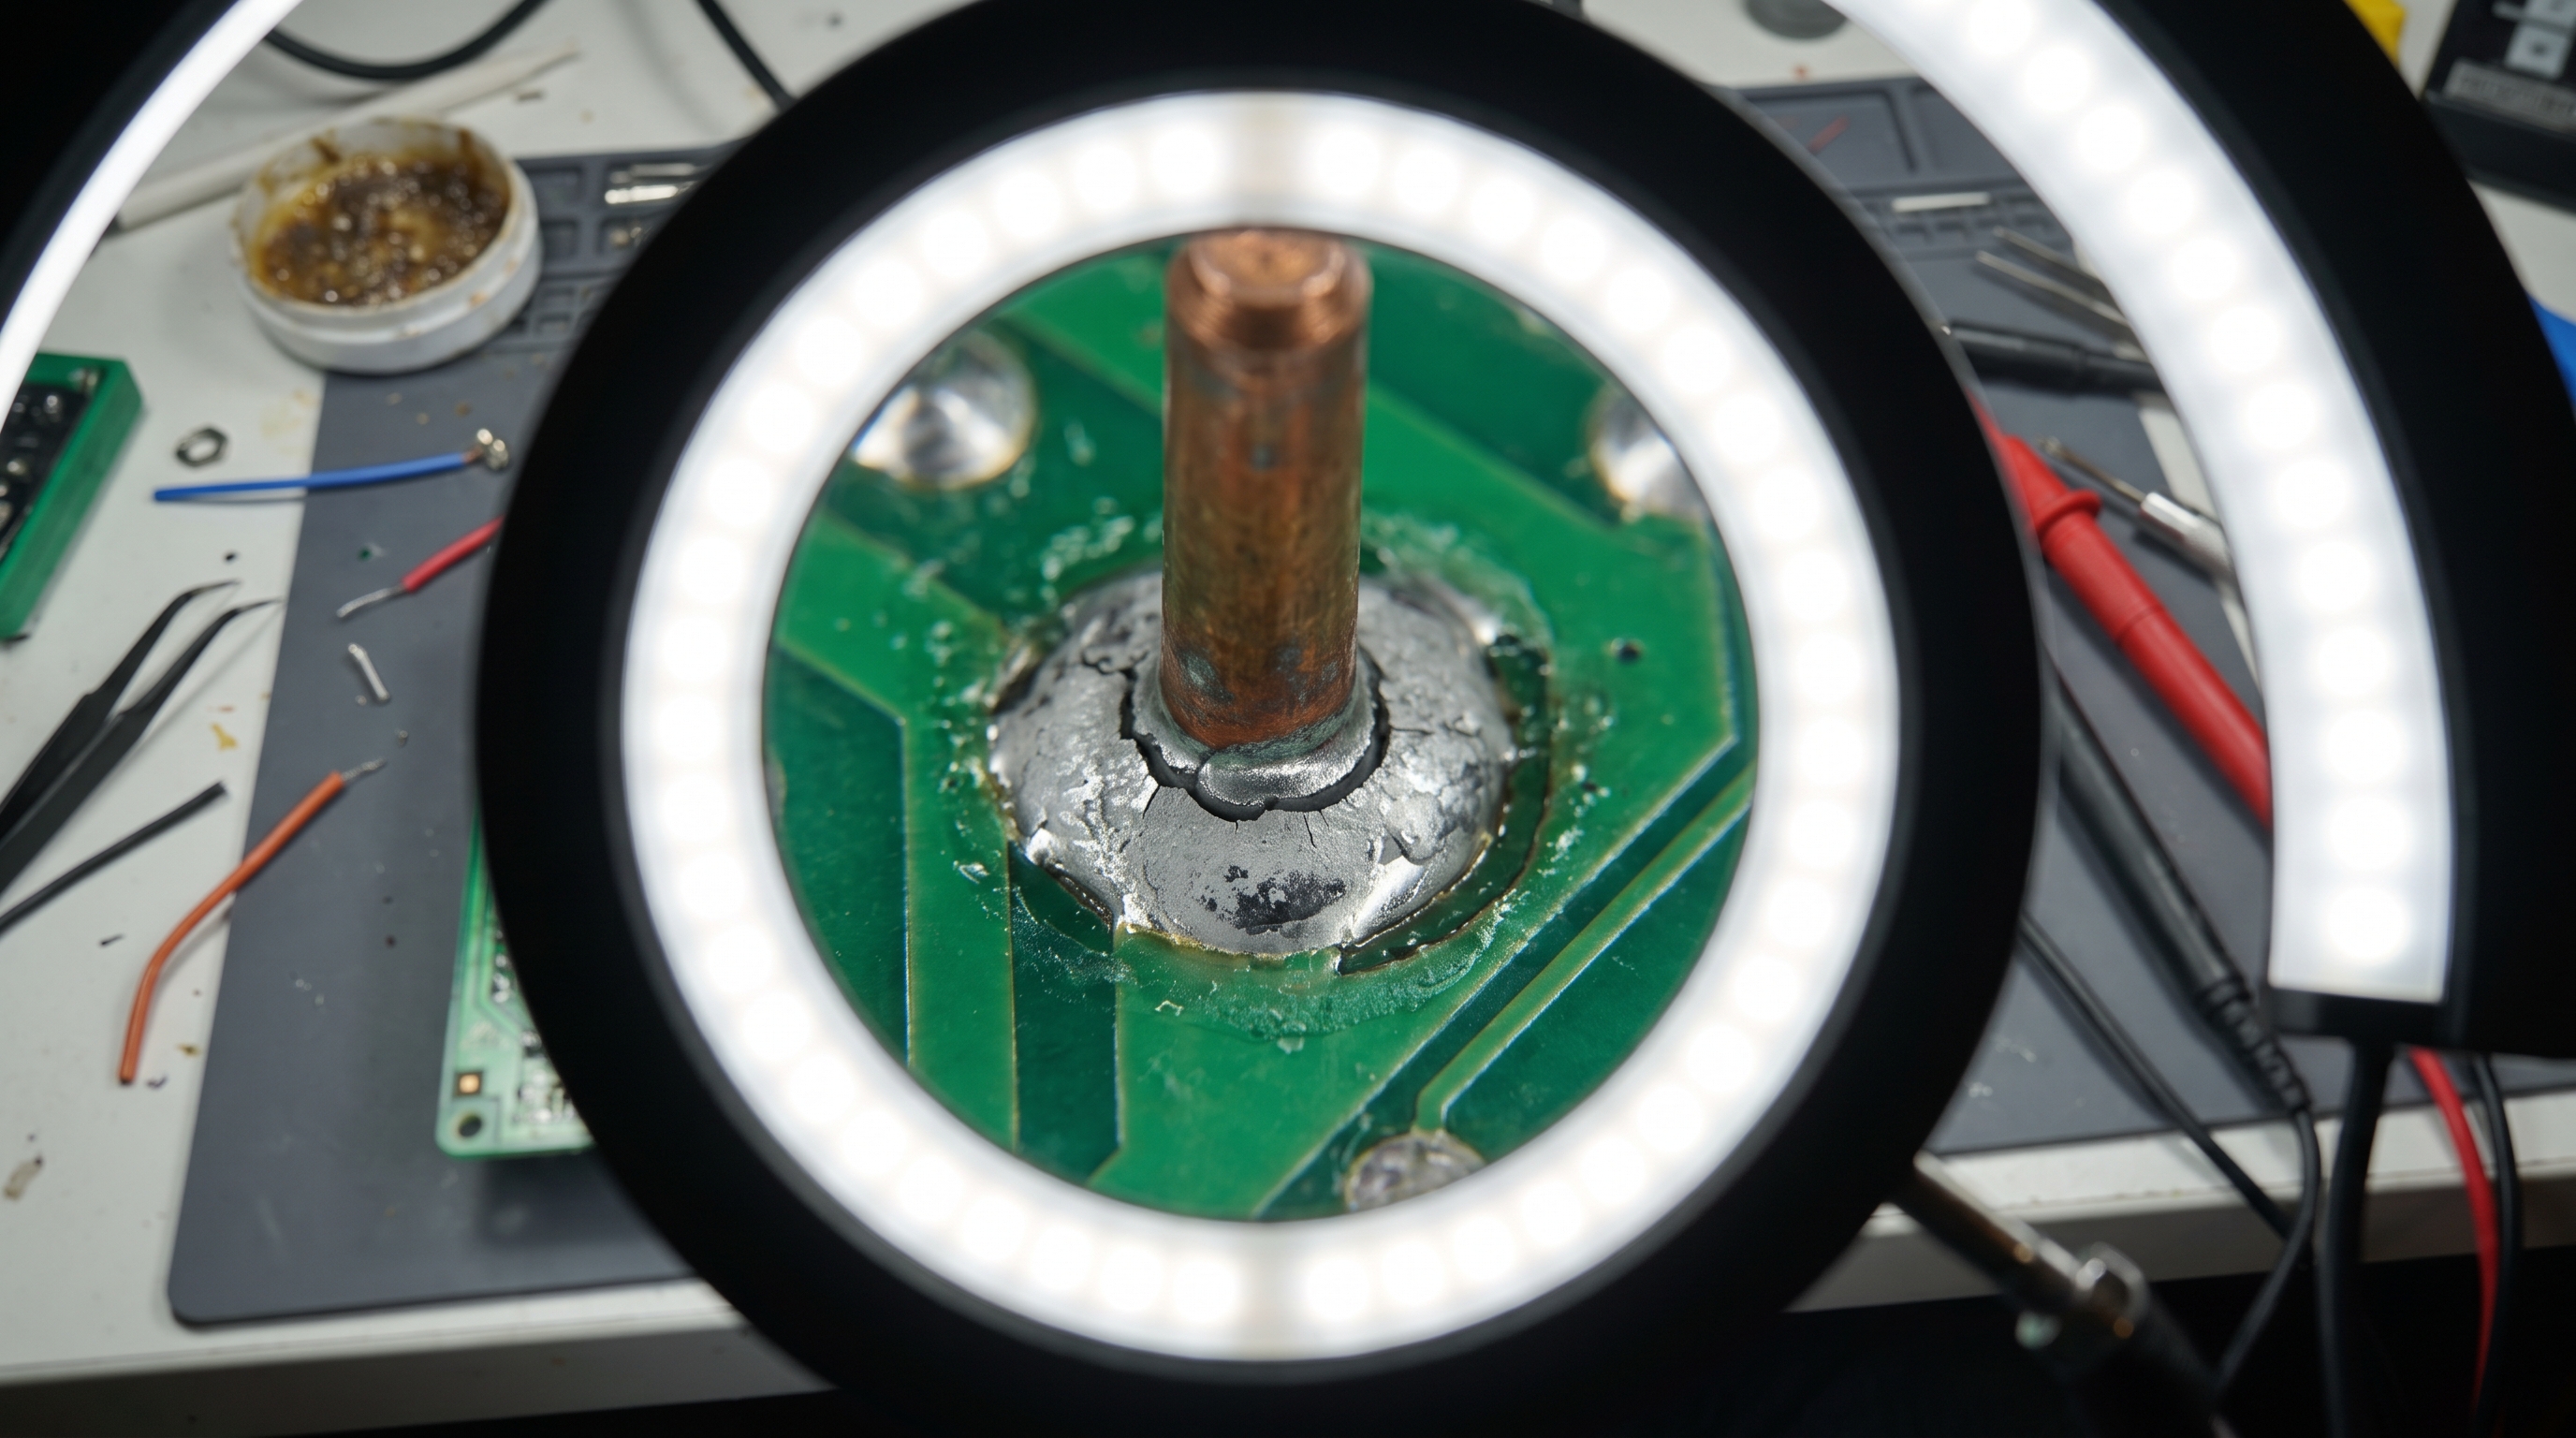
Yes, a micro-fractured solder joint on high-mass components like the transformer will completely break the electrical circuit. When your power adapter stopped working after being dropped, the physical impact likely fractured the brittle intermetallic compound layer of the solder joint. This mechanical break cuts off electricity, leaving your adapter without any voltage output.
How do you fix a cracked solder joint?
Look:
You must use a professional soldering iron and high-quality flux to reflow a fractured connection safely. If you inspect the bottom of the PCB under a magnifying lens, you can easily spot ring-shaped cracks surrounding the pins of heavy transformers or inductors. Reflowing the joint with fresh, silver-bearing solder alloy restores structural strength and electrical continuity.
- Apply liquid flux to the cracked pin to clean off surface oxidation.
- Heat the joint with a clean soldering iron tip set to approximately 350°C.
- Feed in fresh solder until a shiny, concave fillet covers the entire connection.
| Solder Alloy Type | Melting Point | Mechanical Strength | Thermal Cycling Resistance | |
|---|---|---|---|---|
| Lead-Free SAC305 | 217°C | Moderate (Brittle) | Moderate | |
| High-Silver Solder | 221°C | High | Excellent |
This data shows that choosing silver-bearing alloys provides the best long-term protection against thermal expansion stress.
Key Takeaway: Stabilizing heavy PCB components with silicone adhesive during assembly is the best way to prevent solder joints from cracking.
Conclusion
Navigating the complex world of power supply diagnostics can be challenging when critical hardware shuts down. From loose wall outlets and frayed copper wires to overheating components and cracked PCB solder joints, finding why your power adapter stopped working is the first step toward restoring system efficiency. At MK Power Adapter, we eliminate this diagnostic headache by engineering and manufacturing industrial-grade, medical-grade, and custom wall-mount and desktop power supplies that are built to last. Our team can customize output cables, optimize thermal performance, and provide 100% full-load burn-in tested power units that safeguard your operations from costly downtime. To protect your equipment with a reliable, globally certified power solution, contact us today to speak with a dedicated design engineer.
Frequently Asked Questions
How do I know if my power adapter is dead?
You can determine this immediately by testing the DC output voltage with a digital multimeter. If the device’s status LED remains unlit and your meter reads zero volts under a verified wall socket, the internal primary circuitry has failed.
Can I use a higher amperage power adapter on my device?
Yes, you can absolutely do this safely. Your connected equipment will only draw the specific current (amperage) it requires to operate, meaning an adapter with a higher current capacity will run cooler and last longer.
What’s the best way to clean dirty adapter plugs?
You should use a dry microfiber cloth and high-purity isopropyl alcohol to clean them safely. Ensure the adapter is completely unplugged from the wall outlet before wiping down the metal blades to avoid arcing or electrical shocks.
Can I repair a frayed DC power cord myself?
No, you should avoid temporary DIY repairs in professional settings. Simple tape wraps do not restore structural insulation, making it necessary to replace the entire cable assembly or buy a new certified adapter.
How do I know if my power adapter is overheating?
You can tell by touching the plastic casing or checking for the active thermal shutdown behavior. If the housing feels uncomfortably hot to the touch (over 65°C) and the power suddenly cuts off, the internal temperature switch has tripped.